


A Mature Tube Well is one of those “set it up once, benefit for years” investments that quietly pays you back every day. Whether you’re supplying water to a home, a small community, livestock, or a farm, a properly designed and well maintained tube well can deliver dependable flow, better water quality stability, and lower long term headaches than a rushed, poorly finished bore.
- What “Mature” Really Means in a Tube Well
- Why Tube Wells Matter More Than Ever
- Best Use Cases for a Mature Tube Well
- Planning Before Drilling: The Decisions That Save You Money Later
- Mature Tube Well Installation: Step-by-Step (Done Right)
- A Practical Maintenance Plan That Actually Works
- What Causes Performance Drop in Tube Wells?
- How to Tell If Your Tube Well Needs Attention
- Rehabilitation and Restoration: When Maintenance Isn’t Enough
- Long-Term Benefits of a Mature Tube Well
- Cost Factors: What You’re Really Paying For
- Real-World Scenario: Two Farms, Two Outcomes
- Common Questions About Mature Tube Wells (FAQ)
- Conclusion: Build It Right, Then Keep It Right
But here’s the thing most people learn the hard way: tube wells don’t become reliable by luck. They become reliable through smart siting, correct drilling and completion, careful well development, and routine maintenance that prevents small issues from turning into expensive failures.
In this guide, you’ll learn what makes a tube well “mature,” how to install one the right way, what maintenance actually matters (and what doesn’t), how to spot early warning signs, and how to maximize lifespan and performance with practical steps you can apply.
What “Mature” Really Means in a Tube Well
People use the phrase Mature Tube Well in a few slightly different ways, but it usually points to the same idea: a tube well that has been properly constructed, developed, stabilized, and proven in real operation.
A mature system typically has:
- A stable yield (water output doesn’t swing wildly day to day)
- Clearer water after initial settling and development
- Lower sand content (minimal abrasives entering pumps and pipes)
- Better efficiency (less drawdown for the same pumping rate)
- Predictable maintenance needs (no constant “mystery problems”)
In short, maturity is what you get when the well is designed and finished properly, then allowed to “settle” into stable performance through development and controlled use.
Why Tube Wells Matter More Than Ever
Groundwater is carrying a massive share of the world’s water needs. Agriculture alone accounts for about 70% of global freshwater withdrawals, and groundwater supplies a large portion of irrigation and domestic use in many regions.
That growing pressure means two things for well owners:
- Good wells are valuable assets.
- Poorly built wells fail faster and cost more to keep alive.
A well built Mature Tube Well is not just a water source. It’s risk management.
Best Use Cases for a Mature Tube Well
A Mature Tube Well is especially useful when you need:
- Consistent household supply where municipal water is unreliable
- Farm irrigation where downtime is costly
- Livestock and dairy operations that require steady daily water
- Small industries (washing, cooling, processing) needing predictable flow
- Community or shared supply with multiple users
If your water demand is occasional and small, a shallow well might work. But for continuous, serious use, maturity and proper completion matter.
Planning Before Drilling: The Decisions That Save You Money Later
1) Site selection and local risk checks
Before you drill, take time to understand what’s around the site:
- Septic tanks, soak pits, drains
- Chemical storage areas (fertilizers, fuels)
- Livestock pens and waste zones
- Flood prone low spots
This isn’t just “nice to have.” Contamination risk can follow the well for its entire life. Water safety guidance from major public health bodies stresses preventing contamination at the source and testing regularly.
2) Hydrogeology basics that affect yield
Even if you’re not a geologist, ask your driller about:
- Expected aquifer depth and thickness
- Soil and formation type (sand, gravel, clay layers)
- Seasonal water level changes
- Nearby well performance (depth, yield, pump sizes)
A quick local survey often prevents drilling too shallow, too deep, or into the wrong layer.
3) Right sizing: match the well to your actual demand
Oversizing is common and costly. Undersizing is worse.
A simple way to think about it:
- Estimate daily water use
- Identify peak hour demand
- Decide if you’ll pump to a storage tank (recommended for many homes and farms)
- Size the pump and well yield around peak needs, not just daily totals
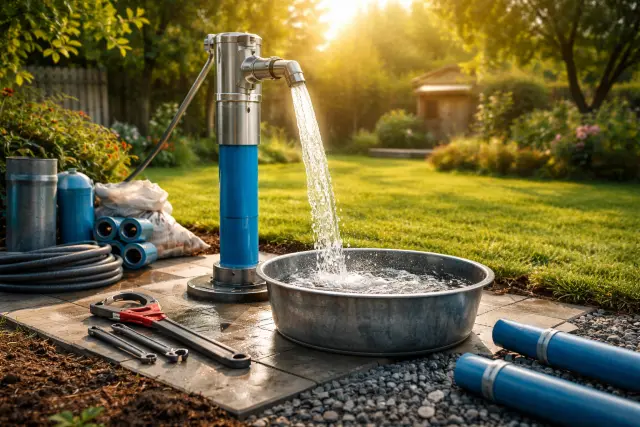
Mature Tube Well Installation: Step-by-Step (Done Right)
Step 1: Drilling the bore
The driller creates the borehole to the planned depth, depending on formation and water bearing zones. Bore stability matters here. If the bore collapses or is left dirty, it can reduce yield and increase sand problems later.
Step 2: Casing selection and installation
Casing supports the bore and protects water quality by preventing surface water intrusion into the well. Material choice depends on budget, water chemistry, and local practice:
- PVC (common, corrosion resistant)
- Steel (strong, but can corrode depending on chemistry)
- uPVC or composite options in some markets
Good casing work reduces long term risks like collapse, leaks, and contamination pathways.
Step 3: Screen design (the heart of the well)
The screen lets water in while keeping formation material out. Screen slot size should match the formation and gravel pack design. If the screen is wrong, you’ll fight sand, low yield, pump wear, and clogging.
Step 4: Gravel pack (filter pack)
In many drilled wells, a gravel pack is placed around the screen to improve filtration and yield. Proper development helps the gravel pack settle and do its job. Guidance on well development highlights its role in maximizing yield and optimizing filter capacity.
Step 5: Grouting and sanitary seal
This is where many wells quietly fail. A sanitary seal helps block contaminated surface water from traveling down the annulus along the casing. If your area faces floodwater, wastewater drains, or intensive agriculture, this step is even more important.
Step 6: Well development (how a well becomes “mature”)
Well development is the controlled process of removing fine particles, drilling fluids, and disturbed formation material from around the screen and gravel pack. It improves yield, reduces turbidity, and lowers sand pumping.
Common development methods include:
- Surging
- Airlifting
- Pumping and backwashing cycles
If this step is rushed, the well may never truly stabilize. That’s why many professionals consider development the turning point from “newly drilled” to Mature Tube Well performance.
Step 7: Disinfection and first water testing
After construction and before regular use, disinfection is often recommended, especially for drinking water systems. Public health guidance also emphasizes safe well disinfection practices and precautions, particularly after contamination events.
Step 8: Pump installation and commissioning
Pump selection depends on:
- Static water level and expected drawdown
- Required flow rate
- Pipe size and head
- Power availability and voltage stability
A smart commissioning step is to run a pumping test and log:
- Pumping rate
- Drawdown over time
- Recovery after pump stops
This becomes your baseline. Later, if performance drops, you’ll know.
A Practical Maintenance Plan That Actually Works
A tube well doesn’t need constant tinkering. It needs consistent, simple checks that catch problems early.
Monthly quick checks (10 to 15 minutes)
- Listen for new pump noise or vibration
- Check pressure and flow consistency
- Inspect for leaks in fittings and pipes
- Look for sand or grit in water (feel it, or check filters)
Quarterly checks
- Inspect electrical connections and control panel
- Confirm pump start and stop behavior is normal
- Clean intake screens or filters (if used)
- Check tank float valves and overflow issues
Annual checks (high impact)
If the well supplies drinking water, annual testing is widely recommended. The CDC advises testing at least once a year for total coliform, nitrates, total dissolved solids, and pH, using a certified lab.
The US EPA also recommends annual testing with a similar baseline set.
Even if you’re using the well mainly for irrigation, annual testing still helps you spot issues like salinity creep, nitrates, or iron that can damage equipment and soils over time.
A simple maintenance schedule table
| Task | Frequency | Why it matters |
|---|---|---|
| Flow and pressure check | Monthly | Detects early performance decline |
| Sand/grit check | Monthly | Prevents pump wear and pipe damage |
| Electrical/control inspection | Quarterly | Avoids overheating and failure |
| Water quality testing (basic panel) | Yearly | Protects health and detects change |
| Pump service (as needed) | 1 to 3 years | Extends pump life and efficiency |
| Performance baseline update | Yearly | Tracks well aging accurately |
What Causes Performance Drop in Tube Wells?
A Mature Tube Well can still lose performance over time, usually for predictable reasons:
Physical clogging
Silt, clay, rust particles, or fine sand can plug the screen, gravel pack, or the aquifer zone near the well.
Chemical encrustation
Minerals can precipitate and build up on screens and near well formations, reducing flow.
Biological fouling (biofouling)
Bacterial growth and slime can clog screens and reduce efficiency over time.
A technical bulletin on well rehabilitation explains that declines in specific capacity often come from physical, chemical, or biological plugging and that rehabilitation aims to remove blockages and restore performance.
How to Tell If Your Tube Well Needs Attention
Watch for these common warning signs:
- You need to run the pump longer to fill the same tank
- Water turns cloudy, sandy, or suddenly changes color
- Pressure fluctuates more than usual
- Pump cycles on and off too frequently
- Electricity cost rises for the same water output
- There’s a noticeable increase in drawdown during pumping
If you track flow rate and pumping water level once a month, you’ll catch problems far earlier than someone who only reacts when the pump fails.
Rehabilitation and Restoration: When Maintenance Isn’t Enough
Sometimes a Mature Tube Well needs more than routine checks. Rehabilitation is a targeted process to restore yield and efficiency when clogging has progressed.
Typical rehabilitation methods include:
- Mechanical brushing or surging
- Airlift cleaning
- Chemical treatments for mineral buildup (handled by professionals)
- Disinfection and biofouling controls where appropriate
Well maintenance and rehabilitation guidance notes that regular maintenance supports adequate water flow and optimum quality, and that testing schedules help ensure continued safety.
A key point: rehabilitation works best when you act early. If you wait for years of decline, recovery is harder and more expensive.
Long-Term Benefits of a Mature Tube Well
1) More consistent water supply
A mature, properly developed well tends to deliver steadier water because the screen and gravel pack have stabilized and fine particles have been cleared.
2) Lower pump and equipment wear
Less sand and grit means:
- Longer pump life
- Less pipe abrasion
- Fewer blocked sprinklers, drip lines, and filters
3) Better energy efficiency
Wells that maintain efficiency generally require less drawdown for the same yield. In practical terms, that can mean lower energy use and less strain on motors. Technical discussions of well efficiency link higher efficiency to lower drawdown and reduced cost to the owner.
4) Better water quality stability
When a well is sealed properly, developed properly, and monitored regularly, water quality tends to remain more stable over time. Annual baseline tests make changes easier to spot.
5) Higher property and operational value
In many regions, a reliable tube well increases the practical value of a home or farmland because water security becomes an asset.
Cost Factors: What You’re Really Paying For
Tube well costs vary massively by region, depth, casing type, and pump size, but you can still understand the “big levers”:
What increases upfront cost:
- Greater depth and diameter
- Higher quality casing and screen materials
- Proper gravel pack and grouting
- Full well development time
- Pumping test and proper commissioning
What increases lifetime cost:
- Poor development (sand problems forever)
- Wrong screen selection
- No sanitary seal (contamination and repeated disinfection)
- Running the pump beyond design rate
- No routine testing, so problems are caught late
A simple way to think about it: paying for correct completion and development often reduces total cost of ownership.
Real-World Scenario: Two Farms, Two Outcomes
Farm A drills a well, installs a pump quickly, and starts irrigating the same week. Development is minimal because “the water looks okay.” Within months, the pump begins pulling fine sand. The farm replaces the pump earlier than expected, flow declines slowly, and electricity costs rise.
Farm B spends extra time on proper screen selection, gravel pack placement, and well development. They record baseline drawdown and flow. In year two, they notice a gradual drop in performance and do early rehabilitation. Their system stays stable and the pump lasts longer.
Both farms drilled wells. Only one ended up with a Mature Tube Well system that behaves like a long term asset.
Common Questions About Mature Tube Wells (FAQ)
How long does a tube well last?
With correct design, development, and routine maintenance, a tube well can operate for many years. Lifespan depends heavily on local groundwater chemistry, pumping rate, sand control, and how early you address clogging and efficiency loss. Tracking specific capacity and acting early is a major factor in extending useful life.
How often should I test my well water?
For private wells used for drinking, annual testing is widely recommended. The CDC recommends at least yearly testing for total coliform bacteria, nitrates, total dissolved solids, and pH, with additional tests depending on local risks.
What’s the fastest way to ruin a tube well?
Two common ways:
- Running the pump harder than the well can sustainably supply (overpumping)
- Skipping proper development and sanitary sealing, which leads to chronic sand problems or contamination risks
Is disinfection something I should do regularly?
Not automatically. Disinfection is commonly recommended after construction, after certain repairs, or after contamination events such as flooding. Safety guidance warns well work can be hazardous and often recommends professional involvement.
Conclusion: Build It Right, Then Keep It Right
A Mature Tube Well is not just a hole in the ground with a pump on top. It’s a system that earns reliability through proper installation, thorough development, and simple, steady maintenance habits. When you treat the well like an asset, you get consistent yield, reduced pump wear, better efficiency, and fewer surprise failures.
If you want your tube well to last, focus on the fundamentals: correct screen and gravel pack design, proper sanitary sealing, good development, baseline performance logging, annual water testing, and early rehabilitation when the numbers start to drift. Do that, and a Mature Tube Well can serve you for the long run with far less stress.
In the last stretch of planning, it also helps to understand how groundwater systems replenish over time through concepts like aquifer recharge, because sustainable pumping and smart site management go hand in hand.


